A good friend of mine is celebrating her birthday in a couple of days. I wanted to give her something special. I'd seen this magic card tutorial on a website, and I thought that would be a nice idea.
A quick search surfaced the perfect comic. And a couple of hours later I did manage to finish this card. To be quite honest, I did not follow the tutorial from the website, but rather made this up as I went along. Surprisingly, it did work out quite nicely.
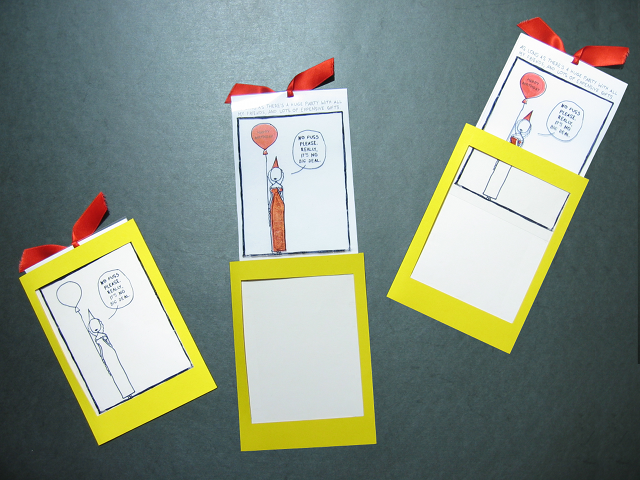
By the way, the messages read:
Speech bubble:
No fuss please. Really, it's no big deal.
Balloon (only when the card is pulled out):
Happy Birthday
Above the cartoon (only when the card is pulled out):
As long as there's a huge party with all my friends, and lots of expensive gifts.
For making the card I used:
- Yellow card stock, A4 (for the base)
- White paper, card stock and tracing paper (for the pull-out card, and for the backing of the "window")
- One sheet of film (for the "magic" effect)
- One black ohp marker (for both the foil and the paper, and my message on the back)
- A red marker (for coloring the dress and balloon)
- Some red ribbon (for the pull-out card)
- Two print-outs of the comic, once normal, once mirror-image
- Some glue (for finishing the card)
- A cutting knife, a metal ruler, and a cutting mat (well, for cutting!)
- Lots of patience
So, in summary, you really don't need all the kit that the blog states. ;)
(Oh, and although I did remove Cathy Thorne's name and website from the comic in the front, I was sure to add it to the back of the card. A wonderful comic indeed!)
Comments
Submitted by Anonymous (not verified) on 7 October 2010 - 12:28am Permalink
how does the color change
how does the color change work
Submitted by Sara on 7 October 2010 - 10:54am Permalink
The magic
Essentially, the image is split into two:
1. On film you draw the image that shall appear before pulling out the card.
2. On normal paper you draw all additional parts. For me this was some color, plus some additional text.
Now the second part is hidden when the card is not pulled out - you only see the stuff that's drawn on the film. But when you pull out the card, then the second part will be visible, too. You have to ensure that the film and the pull-out area are perfectly aligned, so that it's not obvious that there are two parts to the image you see.
Hope this makes sense,
-- Sara
Add new comment